
My events : find all your pending and confirmed vyte.in events
The first time you log on vyte.in, you reach “My events” page.
On this page, you access all the vyte.in events you created and for which you’ve been invited.
There are different statuses for a vyte.in event :
– Confirmed : event is confirmed and vyte.in has already sent the meeting to everyone’s calendar.
– Pending : the event is not confirmed yet.
– Vote needed : you need to set your availability for this event

When you are logged in, you can access the “My events” page from anywhere. Click in the top right corner on your name.

Create an event!
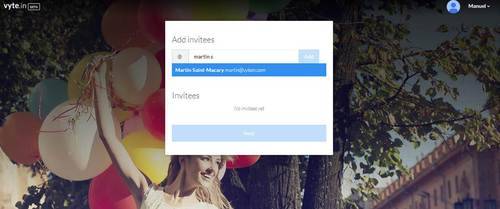
First step – add your invitees
Since you are logged in with your Google account, you have access to all your email contacts.
Just type first letters and vyte.in suggests a list of contacts.
Second step – add a title to your events
Choose a simple and clear title for your event. If you want to add details, it is better to use the “messages” box. The invitees will also receive this message in the vyte.in email invitation.

Third step – suggest dates and times
Just click on the dates you want to suggest. By clicking on the arrows, you can change the month or year in the calendar.

It is always better to make at least three suggestions for a date and time.
All your invitees are more likely to be available for, at least, one of them.

Click directly on the round clock to set your time suggestion.
By default, the round clock shows time from midday to midnight. If you want to suggest an hour before midday, just click on the “AM” button.
When your are done for the “hour” setting, the round clock switches directly to minutes. Just click on the round clock to set the minutes also.
If you want to go back to “hour” setting, just click on the “hour” box, as shown below.
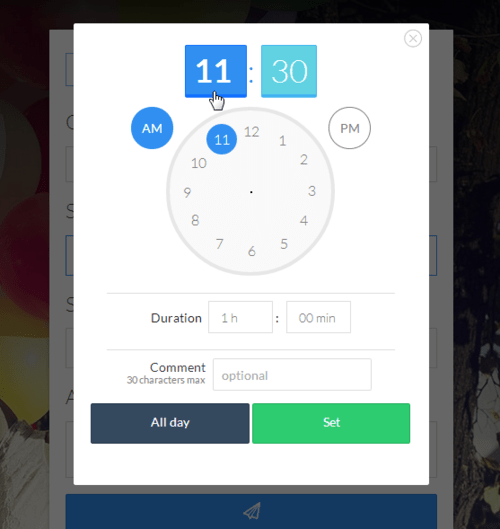
You can set the duration of the meeting, clicking in the “hour” and “minutes” boxes.
If your proposal is for all day, just click on “All day” button.

By default, Vyte uses you Google calendar’s time zone, but you may need to change it in “Time zone” box.
You can either: delete a date(“blue bin” button), or, add a date (“plus” button).